VNCtalk Account Management
Updated till version 4.0
Download & Installation
Install VNCtalk Desktop Client
The download and installation of desktop clients are the same for all VNCproducts. Refer to the "VNClagoon Desktop Client Installation" section, for a step-by-step guide.
Switch among VNClagoon apps
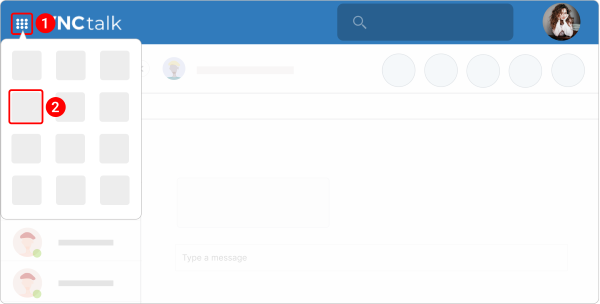
We offer single sign on (SSO) for our complete VNClagoon software suite. You can use the App Switcher to go to any another VNClagoon product from VNCtalk if you have a subscription to the product. It means that you do not need to open the product URL in a browser and enter your credentials to log in.
- In the upper left corner, click the bento menu icon
 . You see only the products you are subscribed to.
 - Click the required product and you will be redirected to this product.
Log out
Logging out of an account in VNCtalk does not delete your account.
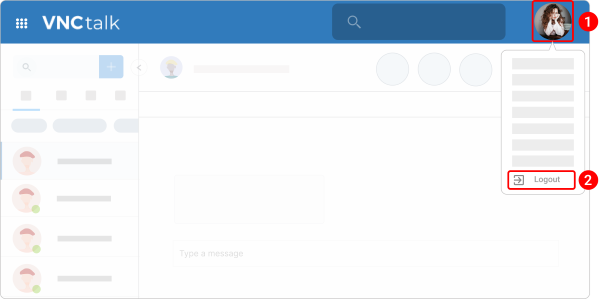
- In the upper right corner, click your profile image.
- From the dropdowm menu, select Logout.
- When prompted, click LOGOUT confirming that you want to log out.
Account Information
Create an account
If you create a new account in the VNCtalk Desktop Client, ensure that you are using the proper URL. For this, click "Change server URL" on the login page, enter the appropriate URL, and click "Change".
- Go to the VNClagoon Account sign in page.
- Select Create New Account. You will be redirected to the VNCdirectory sign up page.
- Enter your first name, last name, email address, and select a country.
- Enter and confirm your password.
- Click CREATE ACCOUNT. Once you register, a verification email will be sent to your email address.
- Click on the access link provided in the email to activate your account.
- Enter your credentials in the labeled fields and click LOGIN.
- Read VNClagoon’s terms and policies, then click Accept, if you agree to the terms, to create your account.
- Choose VNCtalk from the VNClagoon start page.
Change your profile image
You can add a VNCtalk profile image or change your current profile image. By default, your avatar is a circle with your username's initials.
- In the upper right corner, click your profile image.
- Select Profile from the dropdown menu. The "Profile" sidebar opens.
- Click the pencil icon
 next to your avatar.
 - Click the plus icon and select an image from your device.
- Customize your image if needed.
- Click Apply.
Edit your profile information
You can customize your profile by adding a name, company, and position.
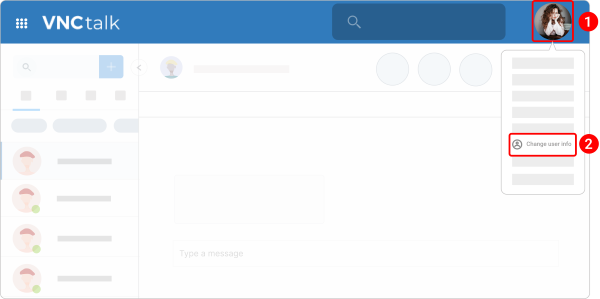
- In the upper right corner, click your profile image.
- Select Change user info from the dropdown menu.
- Edit the profile information.
- Click UPDATE.
Change VNCtalk icon and image
You need to be Admin to change the default VNCtalk icon and image.
You can customize the VNCtalk appearance settings by changing the icon (1) and image (2).
The procedure for changing the VNCtalk icon and image is the same for all VNClagoon applications. Refer to the "Customize organization settings" section for the step-by-step guide.
Add a logo to VNCtalk header
You need to be Admin to add a logo to the VNCtalk header.
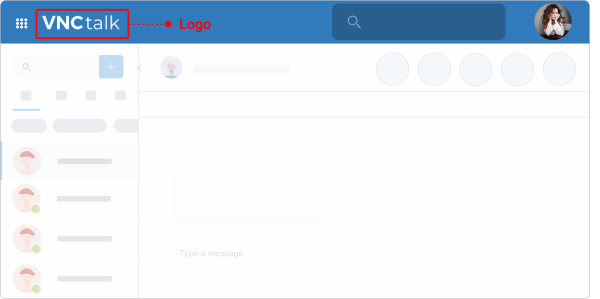
The logo appears at the top of the VNCtalk main page.
The procedure for adding the logo to the VNCtalk header is the same for all VNClagoon applications. Refer to the "Customize an application logo in the header" section for the step-by-step guide.
Help & Privacy Statement
Access Help Center
In case you hand in a support request or bug report please always provide the following information: App version number, browser version number, OS version and in case of bugs the time when the bug occurred.
- In the upper right corner, click the profile image.
-
Navigate to Help and select one of the following options:
- App info. The version number of VNCtalk you are using.
- Manuals & Documents. A comprehensive user guide providing step-by-step instructions on how to use VNCtalk.
- VNC Service Desk. Adding a support request.
Access "Legal Notice"
- In the upper right corner, click a profile image.
-
Navigate to Help and select one of the following options:
- Terms of use. The "Terms of Service" agreement provides details about the relationship between VNClagoon and users. It sets forth clauses that embody the rules, requirements, restrictions, and limitations that a user must agree to use the VNClagoon applications.
- Data privacy. The Data Privacy Policy provides details about what type of information is collected and tracked on the website, how the information may be used, and with whom the information may be shared.


