VNCcontacts Web Client User Manual
Last update: February 9, 2021
Getting started
Install VNCcontacts Desktop Client
To install the VNCcontacts desktop client follow exactly the same procedure as that of installing the VNCtalk desktop client. Refer to the "VNClagoon Desktop Client Installation" section, for a step-by-step guide.
A quick overview of VNCcontacts
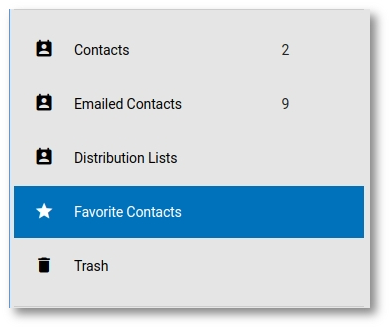
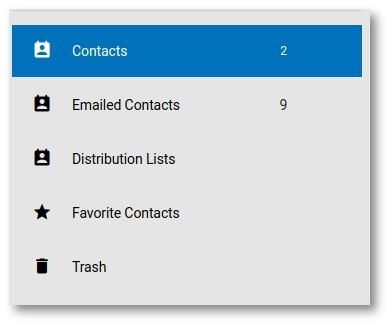
VNCcontacts looks as follows:
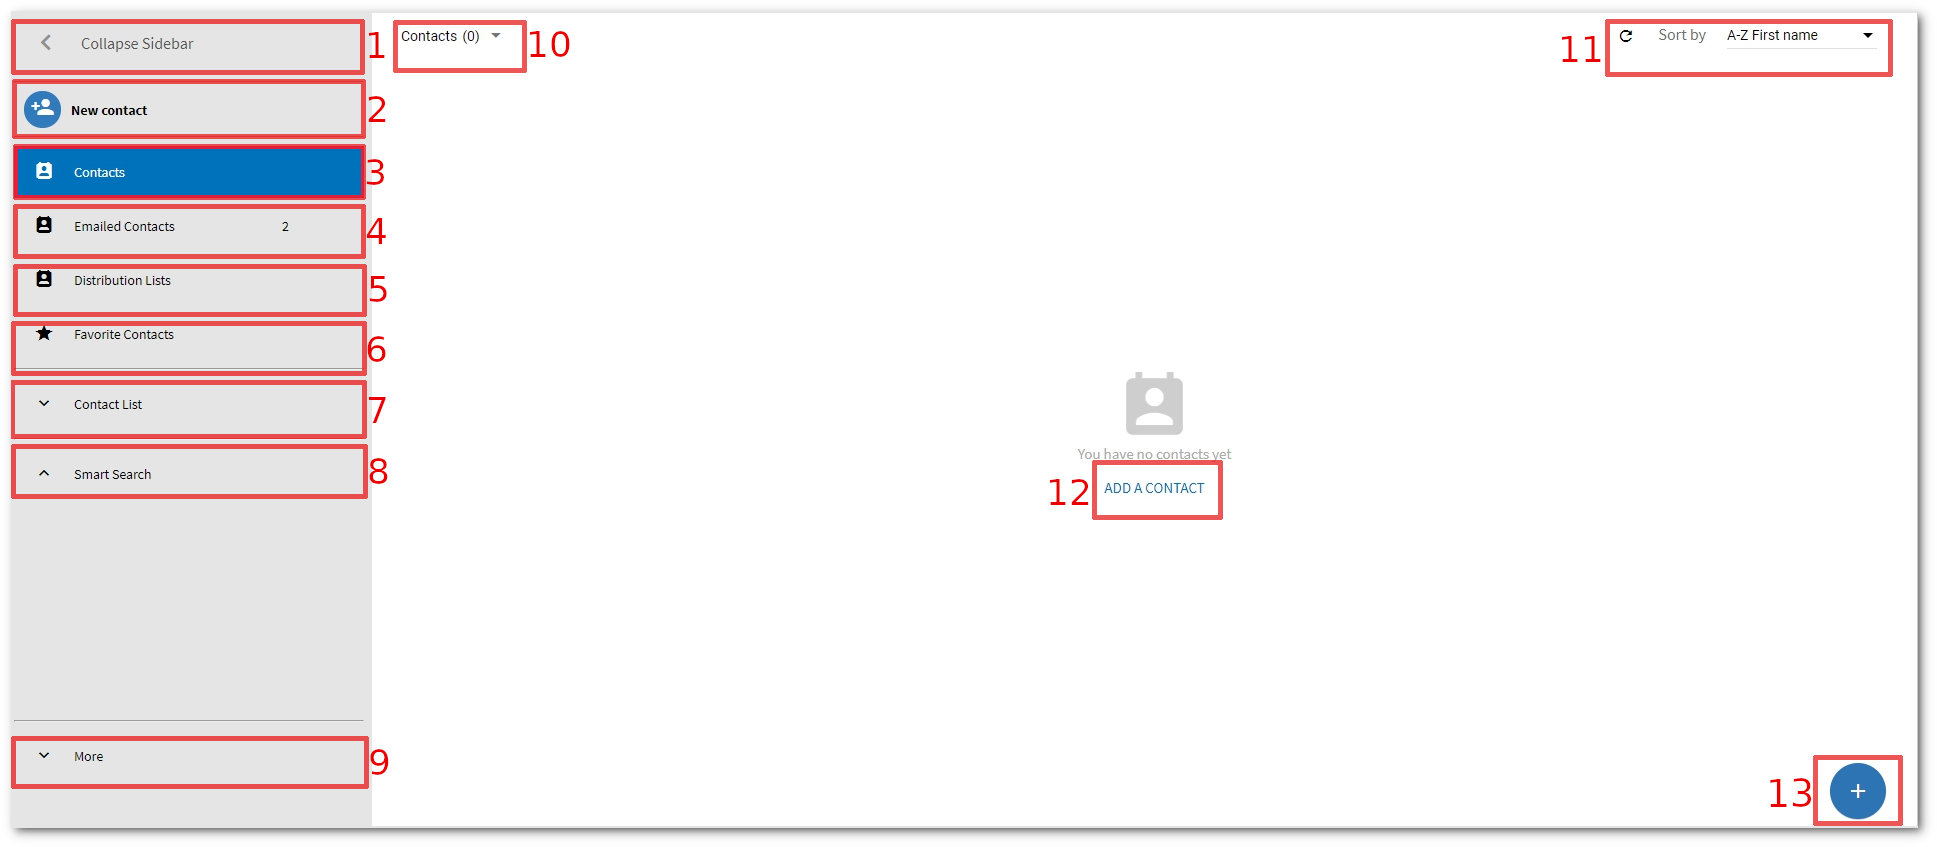
| Number | Description |
|---|---|
| 1 | "Collapse Sidebar" button. The button allows to expand or contract the Sidebar |
| 2 | "New contact" drop-down-menu. The menu allows to create a contact and a contact group, create a list and add a shared folder |
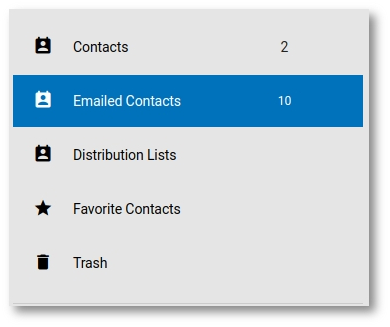
| 3 | "Contacts" list. The list contains all your contacts |
| 4 | "Emailed contacts" list. The list contains email addresses to which you send contacts |
| 5 | "Distribution lists". The list contains a group of email addresses contained in a list with a common email address. When users send to a distribution list, they are sending the message to everyone whose address is included in the list |
| 6 | "Favorite Contacts" list. The list contains contact which you mark as favorite |
| 7 | "Contact List" list. The list contains groups with contacts |
| 8 | "Smart Search" list. The list contains saved search results in folders |
| 9 | "More" list. The list contains "Import", "Export", and "Print" options |
| 10 | drop-down menu. The menu allows to go to "Contacts", "Emailed Contacts" or your created list quickly |
| 11 | filter. It allows to sort contacts |
| 12 | "ADD A CONTACT" button. Is it visible only when you have no contacts. The button allows to create a contact |
| 13 | "Create Contact" button. the button allows to create a contact |
Upload the profile photo
-
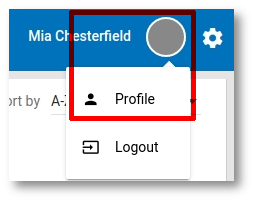
Click the profile photo icon and click Profile:
-
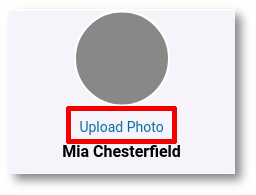
Click Upload Photo:
-
Click UPLOAD and select required photo/picture, and crop it.
- Click Save.
Remove the profile photo
-
Click the profile photo icon and click Profile:
-
Click Upload Photo:
-
Click REMOVE, then click Save.
Set the language
-
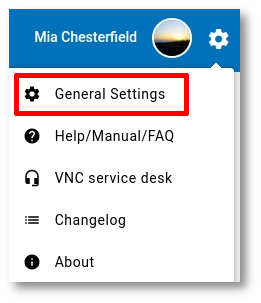
Click the cogwheel icon and click General Settings:
-
Select the language from Language drop-down menu.
- Click SAVE.
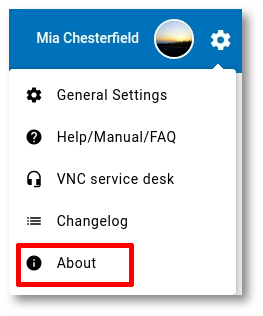
Check VNCcontacts version
To check VNCcontacts version, click the cogwheel icon and click About:
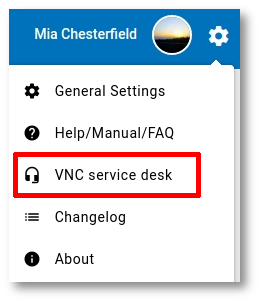
Create an incident in VNC Service Desk
-
Click the cogwheel icon and click VNC service desk:
-
Click VISIT VNC SERVICE DESK:
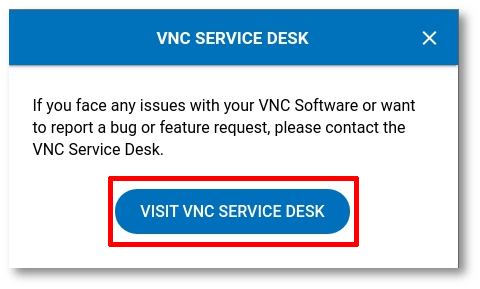
You should be redirected to VNCproject. Fill in the fields. The fields with the asterisk are required. If you need to attach something - click Browse at the bottom.
-
Click Create at the bottom.
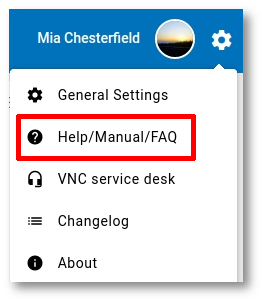
Access "User Manual"
-
Click the cogwheel icon and click Help/Manual/FAQ:
-
Click required URL.
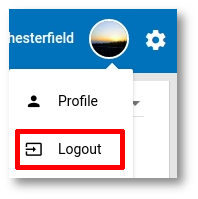
Log out
To log out, click the profile photo icon and click Logout:
Contacts
Create a contact
There are 3 ways to create a contact:
- using New contact drop-down menu;
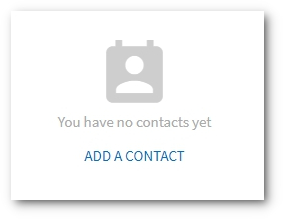
- using ADD A CONTACT button. The button is not visible when you have some contacts. The button can be used only for creating a contact when you have no contacts at all;
- using the plus icon.
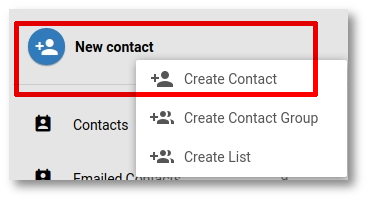
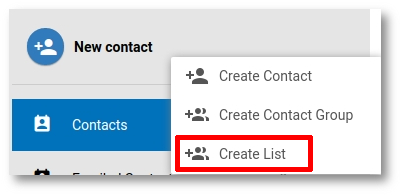
Way 1 - using "New contact" drop-down menu:
-
Click New contact and click Create Contact:
-
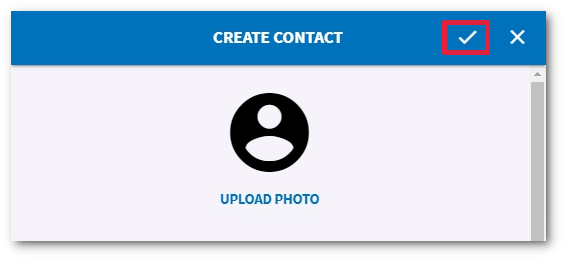
Fill in all required fields. If you need to add a contact's photo - click UPLOAD PHOTO. Then click UPLOAD, select required photo, and click Save.
-
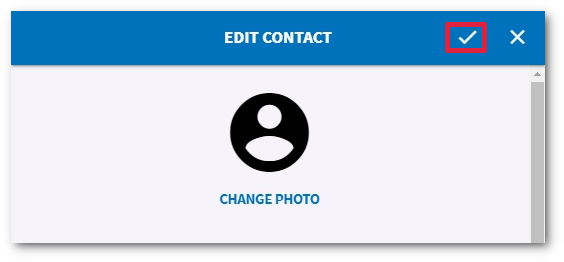
Save the changes - click the checkmark:
Way 2 - using "ADD A CONTACT" button:
-
Click ADD A CONTACT:
-
Fill in all required fields. if you need to add a contact's photo - click UPLOAD PHOTO. Then click UPLOAD, select required photo, and click Save.
-
Save the changes - click the checkmark:
Way 3 - using the plus icon:
- Click the plus icon at the bottom right.
- Fill in all required fields. If you need to add a contact's photo - click UPLOAD PHOTO. Then click UPLOAD, select required photo, and click Save.
-
Save the changes - click the checkmark:
Edit a contact
-
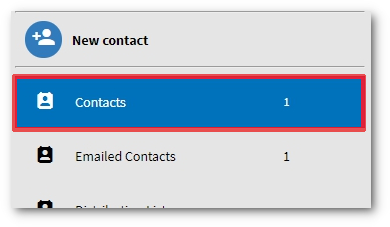
Click Contacts:
-
Hold the pointer over required contact - you should see the pencil icon next to a contact:
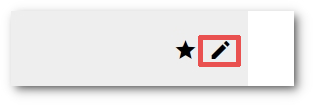
or you can hold the pointer over a contact and click the check box. You should see the pencil icon next to a contact too:
-
Click the pencil icon and edit a contact.
-
Save the changes - click the checkmark:
Print a contact
-
Click Contacts:
-
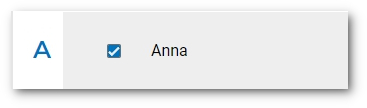
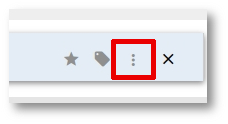
Hold the pointer over a contact and click the check box:
-
Click the kebab menu and click Print:
Import contacts
-
Click More:
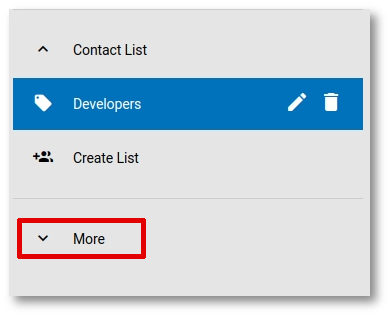
-
Click Import and select a list, from which you want to import contacts, from List drop-down menu.
- Click IMPORT CONTACTS.
Delete a contact
After you delete a contact, it is moved to Trash. You can delete a contact permanently or recover it from Trash.
-
Click Contacts:
-
Hold the pointer over a contact and click the check box:
-
Click the kebab menu and click Delete:
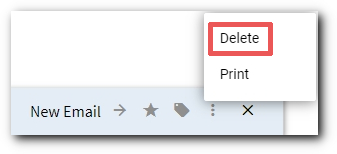
-
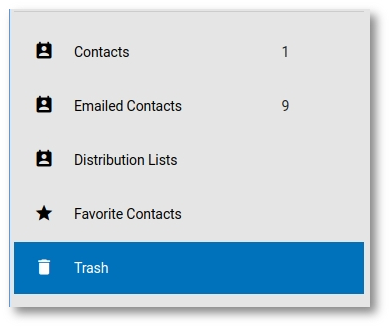
If you want to delete the contact permanently - click Trash:
-
Use the Search field to find required contact.
-
Hold the pointer over a contact and click the check box:
-
Click the kebab menu and click Delete:
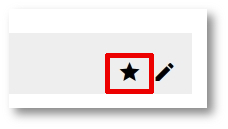
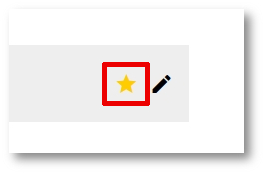
Mark/unmark a contact as favorite
Favorite contacts are moved to "Favorite Contacts" list:
-
Click Contacts:
-
Search for required user. Then hold the pointer over the user and click the star icon on the right. Or you can click the user and click the star icon:
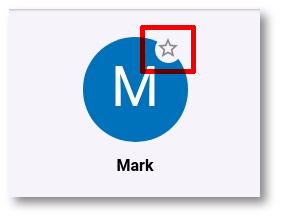
The contact will be available not only in "Contacts" list, but also in "Favorite Contacts" list:
If you unmark a contact as favorite, it will be available only in "Contacts" list.
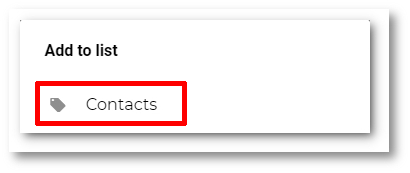
Move a contact to a contact list
-
Click Contacts:
-
Hold the pointer over the contact and click the check box:
-
Click the icon shown on the screenshot:
-
You have 2 options here:
Option 1: add a contact to existing list(s) - for it just click required list.
Option 2: create a contact list and add a contact there - for it click Create new:
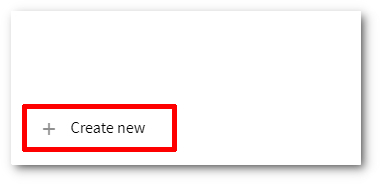
Then name the list and click OK. And add the contact to the created list - click this list:
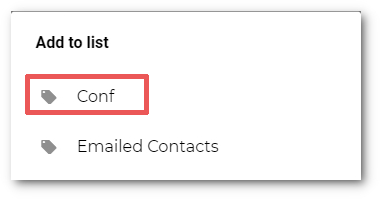
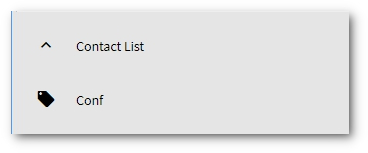
The created list with the contact is available in "Contact List":
Contact Groups
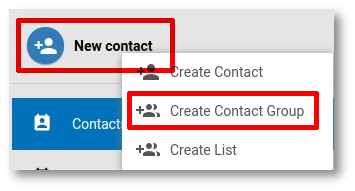
Create a contact group
You can create any contact group with users:
-
Click New contact and click Create Contact Group:
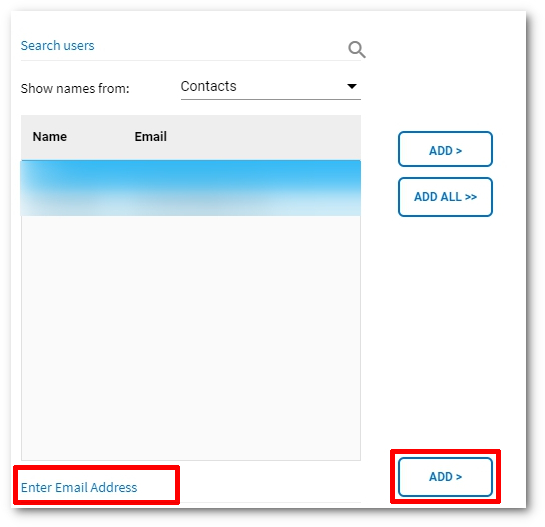
-
Enter a contact group name to List name field. To add users:
- you can use Search users field for searching users - then click ADD >;
- you can select a list, from which users are displayed, from Show names from drop-down menu - then click ADD > for adding individual users or ADD ALL >> for adding all users from a list;
- you can add users' email addresses in Enter Email Address field - then click ADD >:
-
Click SAVE. The created group is available in "Emailed Contacts" list:
Edit a contact group
There are 2 ways to edit a contact group:
- using the pencil icon;
- using Edit button.
way 1 - using the pencil icon:
-
Click Emailed Contacts:
-
Hold the pointer over required contact group, you should see the pencil icon:
-
Click the icon and edit a contact group.
- Click SAVE.
Way 2 - using "Edit" button:
-
Click Emailed Contacts:
-
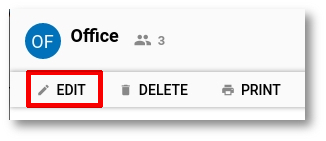
Click required contact group and click EDIT:
-
Edit a contact group and click SAVE.
Print a contact group
There are 2 ways to print a contact group:
- clicking a contact group;
- without clicking a contact group.
Way 1 - clicking a contact group:
-
Click Emailed Contacts:
-
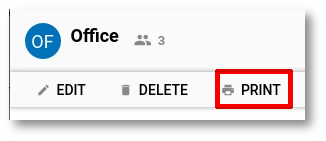
Click required contact group and click PRINT:
Way 2 - without clicking a contact group:
-
Click Emailed Contacts:
-
Hold the pointer over required contact group and click the check box:
-
Click the kebab menu:
-
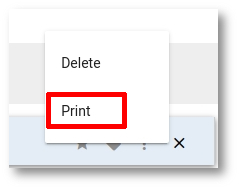
Click Print:
Delete a contact group
There are 2 ways to print a contact group:
- clicking a contact group;
- without clicking a contact group.
Way 1 - clicking a contact group:
-
Click Emailed Contacts:
-
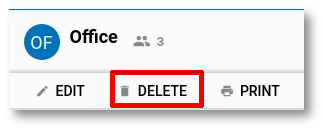
Click required contact group and click DELETE:
Way 2 - without clicking a contact group:
-
Click Emailed Contacts:
-
Hold the pointer over a contact group and click the check box:
-
Click the kebab menu:
-
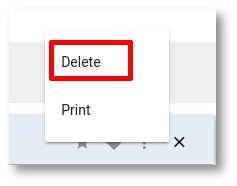
Click Delete:
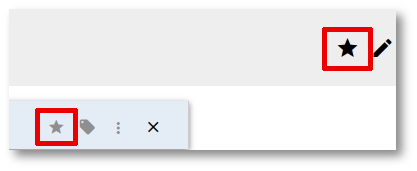
Mark a contact group as favorite
Contact groups, marked as "favorite", are moved to "Favorite Contacts" list:
-
Click Emailed Contacts:
-
Hold the pointer over a contact group and click the appeared star icon:
Or you can hold the pointer over a contact group and click the check box. You should see the star icon next to a contact group too:
Then click any star icon:
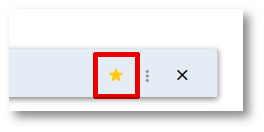
Unmark a contact group as favorite
Contact groups, unmarked as favorite, are moved from "Favorite Contacts" list to "Emailed Contacts".
-
Click Favorite Contacts:
-
Hold the pointer over a contact group and click the star icon:
Or you can hold the pointer over a contact group and click the check box. You should see the star icon next to a contact group too:
Then click any star icon:
or
Move a contact group to a contact list
You can move a contact group to "Contacts" list or to any created list:
-
Click Emailed Contacts:
-
Hold the pointer over a contact group and click the check box:
-
Click the icon shown on the screenshot:
-
You have 2 options here:
Option 1:
add a contact group to "Contacts" list - for it just click Contacts:
Option 2:
- create a list and add a contact group there - for it click Create new:
- name a list and click OK;
- add a contact group to the created list - click this list:
Contact lists
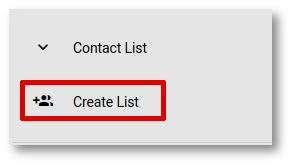
Create a contact list
-
Click New contact and click Create List:
Or you can click Create List in Contact List block:
-
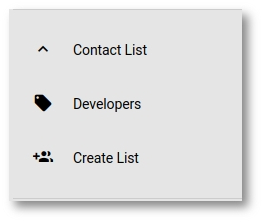
Enter a list name to the field and click OK. You should see the created list in Contact List block:
Add a contact to a contact list
If you need to add a new contact to a contact list (it is a new contact and you do not have it in your contacts list) - follow the steps in this section. If you need to add an existing contact (this contact is already in your contacts list), see Move a contact to a contact list section.
-
Click required contact list in Contact List block:
-
Click ADD A CONTACT:
Or you can click the plus icon at the bottom right.
-
Fill in the fields.
Delete a contact from a contact list
After you delete a contact, it is moved to Trash. You can delete a contact permanently or recover it from Trash.
-
Click required contact list in Contact List block:
-
Hold the pointer over required contact and click the check box:
-
Click the kebab menu and click Delete:
-
If you want to delete the contact permanently - click Trash:
-
Use the Search field to find required contact.
-
Hold the pointer over a contact and click the check box:
-
Click the kebab menu and click Delete:
Rename a contact list
-
Click required contact list in Contact List block:
-
Click a contact list and click the pencil icon:
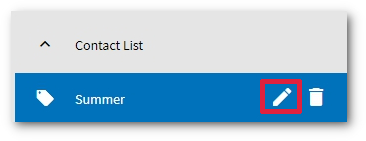
-
Rename a list and click RENAME.
Delete a contact list
-
Click required contact list in Contact List block:
-
Click a contact list and click the trash icon:
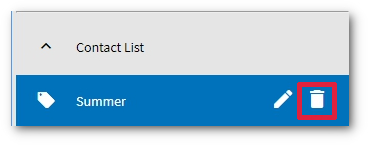
-
Confirm that you want to delete a contact list - click DELETE.
Export a contact list
You can export a contact list in CSV format.
-
Click More:
-
Click Export. Select a list, from which you want to export contacts, from List drop-down menu.
- Click EXPORT.
Print a contact list
-
Click More:
-
Click Print. Select a list, from which you want to print contacts, from List drop-down menu.
- Click PRINT.
Advanced Search
"Advanced Search" allows to search in contacts, contact lists, and contact groups.
To use "Advanced Search" click the filter icon:
![]()
Then select required folder from the drop-down menu and enter a search request to the field below. And click APPLY.